I decided to stop using VS Code completely and see how long I could use Neovim. It’s been 5 weeks and so far it’s been great. I wish I’d done it earlier.
What is Vim and Neovim
Vim
Vim is a free and open-source text editor that evolved from the original vi editor which dates back to 1976. It allows users to perform complex editing tasks through keyboard shortcuts without relying on a mouse. Vim has a text user interface (TUI) instead of a Graphical user interface (GUI).
Vim is a mode-based editor, with the popular modes being “Normal”, “Insert”, and “Command” mode. Vim users will navigate and issue editor commands in Normal mode, type text in Insert mode, and issue commands (e.g. saving, quitting, or find and replace) in Command mode.
Vim’s modes simplify tasks as they separate typing from actions and eliminate complex multi-key operations. Complex operations are issued via keystrokes with a clear purpose, resulting in a smoother process with minimal keystrokes and minimal movement from the keyboard’s home row. The caveat is switching modes and learning the keystrokes is complex and takes a while before it feels right.
Despite the complexity, in a StackOverflow 2023 survey, Vim was voted the 5th most popular text editor. 22.29% respondents said they regularly used Vim and wanted to continue to using it.
Neovim
Neovim is a fork of Vim that strives to improve the extensibility and maintainability of Vim. Neovim supports Lua scripting in addition to VimScript, making it easier for the community to extend the editor. You can learn more here about the vision of Neovim.
Compared to Vim, it has new powerful features such as: a well documented API, job-control, LSP support, built-in parser support, and more. Overall it feels more community-focused than Vim.
In the StackOverflow survey mentioned earlier, it was voted the 10th most popular text editor, however it was the most admired editor.
Learning Vim
During my annual leave January last year (20 months ago) I decided to learn Vim. I got curious after watching and talking to Vim users at work. Before Vim I used nano in the terminal for many years and VS Code as my GUI text editor and IDE of choice.
I chose to try Neovim on my workstation and Vim on remote servers.
I learnt the basics from the Tutor built into Vim via :Tutor. I also read sections of the Learn Neovim book by Ofir Gal which was helpful for understanding key concepts.
I found Vim and Neovim perfect for working on remote servers, changing configuration files, and making basic changes. However, I found it difficult to use for app development as it was too limiting.
I tried building out a basic Neovim configuration and installed plugins to make it more feature rich, but combined with learning Vim it was too much for me to handle. Instead I continued using VS Code for app development.
The Vim concepts and keybindings still intrigued me, so I installed a Vim extension for VSCode. The extension provides the productivity boost and behaviours of Vim alongside the powerful feature-set and familiarity of VS Code. I recommend it to anyone interested.
I also enabled Vim keybindings in Obsidian. I was definitely working faster after using Vim bindings in my editors for a few months as I was relying on the keyboard and less on the mouse. Cause I’d adjusted to the bindings from using the GUI programs, I was able to edit files a lot faster in the terminal. I no longer found editing files remotely over SSH a hindrance and was willing to do more changes over shell sessions. This helped me out a lot at work.
Switching over
The itch to stop emulating Vim and use the real thing was too big so I decided to try give switching another chance. I wanted more control over my text editor as I was doing JavaScript & CSS injection in VS Code’s Electron runtime to customise it which would break on most updates. I also felt like a heavy opinionated Electron editor was no longer for me and a terminal based workflow would be nice.
Before switching I thought about all the VS Code features I wanted in my new environment:
- Buffer manager
- Go to bindings
- Re-ordering bindings
- Indentation detection
- Indentation guides
- Git integration
- File finder (Ctrl + P)
- Text finder (Ctrl + Shift +F)
- Syntax highlighting
- Treesitter
- LSP
- Language Server Protocol (LSP)
- Manager
- Go to definition
- Show definition
- Completion
- LSP
- Snippets
- Command line
- Styling
- A nice theme
- Highlighting on TODOs
- Colouriser for hex codes
- Status line
- Directory manager
- Session management
- Rainbow parentheses
- Indentation guides
I suggest doing the same exercise.
As mentioned earlier, I previously attempted setting up a Neovim environment and it was incredibly time-consuming. Most of the features I wanted are not available out of the box and require third-party plugins. After asking people for plugin suggestions the list quickly piled up. I just wanted something that would work that I could change later when I felt like customising/ricing it to suit me.
Trying out presets
Struggling with distributions
Luckily people online have tried solving my problems by having Neovim configurations available.
There’s generally two ways of getting started:
- using a Neovim distribution
- using and modifying a basic configuration
- less feature-rich
- likely missing a couple of things you want
- generally people’s dot-files, Neovim “templates”, or “basic configurations”
I tried two popular Neovim distributions (based on GitHub stars) and both of them gave me a giant wall of errors each time I opened a buffer. I’m not going to name and shame them as it’s likely my fault. I was frustrated after waiting for an absurd number of plugins to download for it to not to function.
I immediately kicked into troubleshoot mode and started fixing problems. Eventually I sat back and came to the realisation that it shouldn’t be this hard.
kickstart
Before I gave up again, a colleague suggested I try kickstart.nvim. It’s absolutely amazing.
kickstart is a highly documented less opinionated starting point / basic configuration for Neovim. It has LSP, treesitter, telescope (fuzzy finder), some sane default options, and that’s it.
If you’d like additional LSP servers or treesitter parsers, it’s written in the config how to add them. The result is a reasonably light Neovim environment, most of the config is just documentation in the comments.
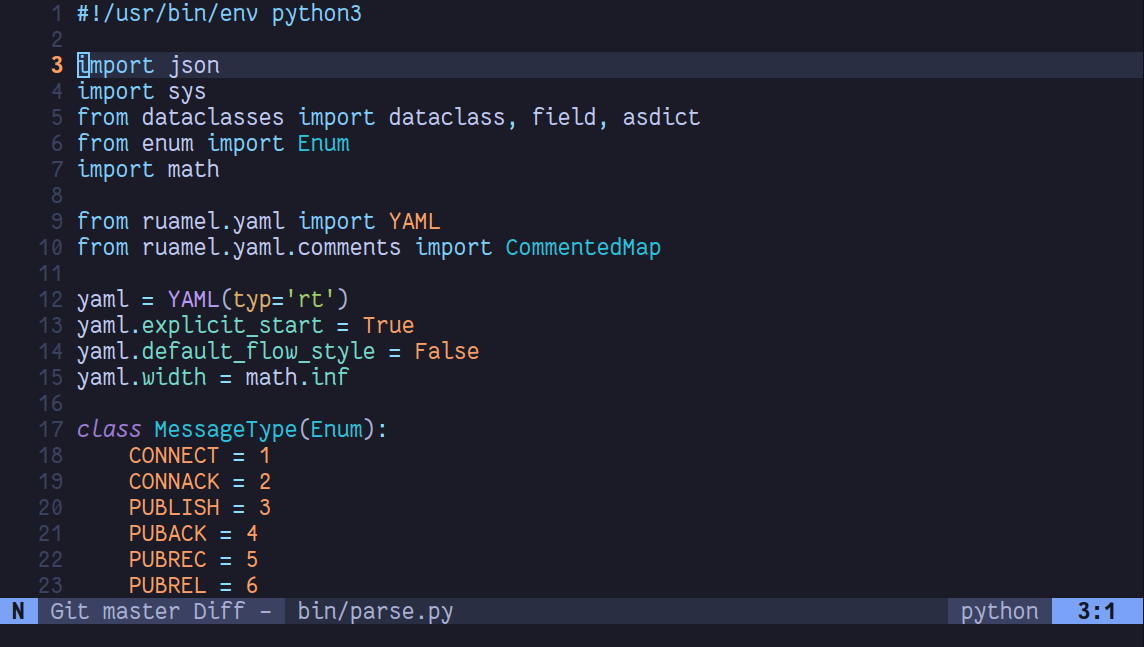
Here’s how kickstart looks:
Kickstart out of the box
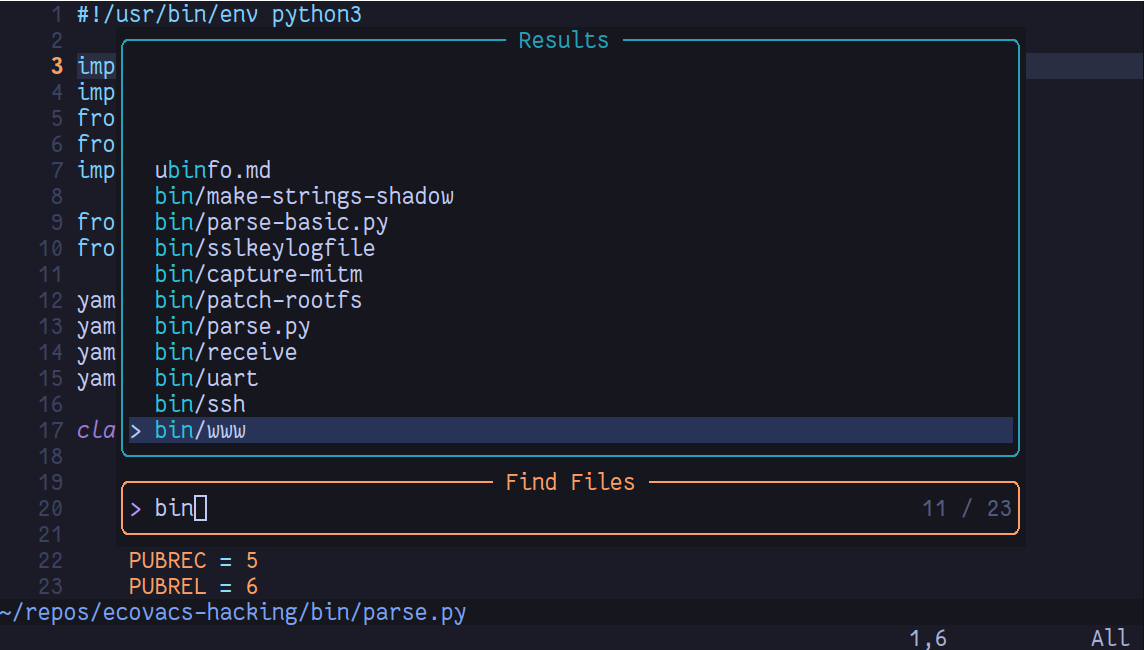
Telescopes file finder
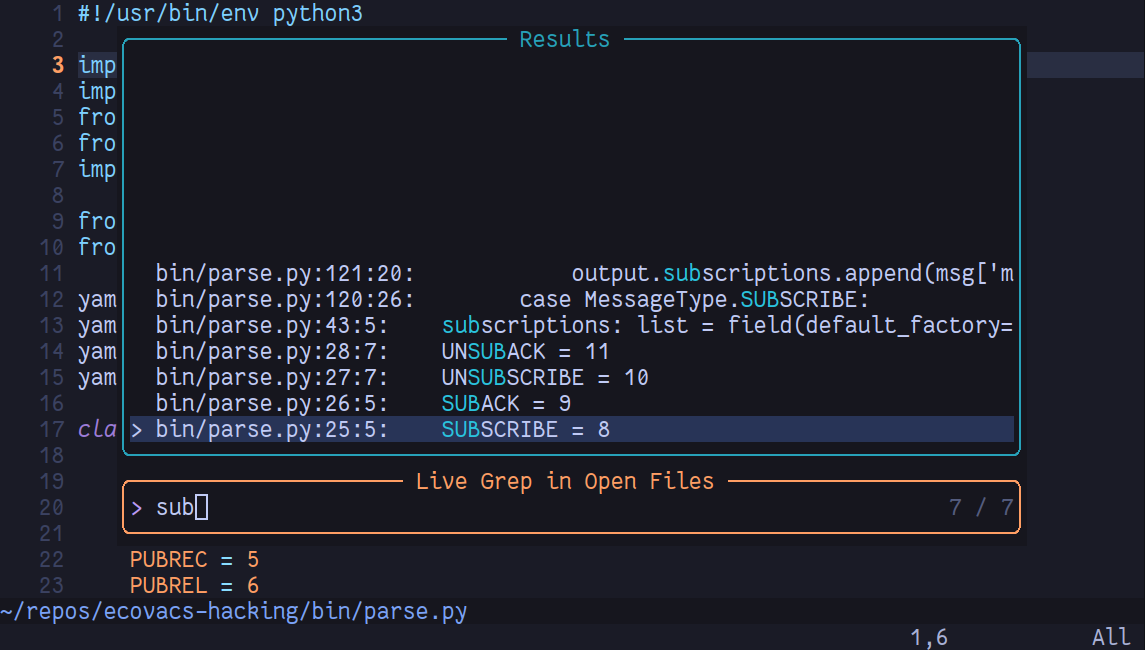
Telescopes live grep
Kickstart clocks at only 26 plugins, most of which enhance language features or add Telescope functionality, so it's fairly lightweight but lacking a couple things from the list mentioned earlier.
My setup
Configuration
Which brings us to me. I run a modified version of kickstart. Typically I break my dot-files up into multiple files (see my zsh and tmux), but I’ve not done that yet and just extended the single file kickstart.
To help extend my config I used a bunch of plugins from rockerBOO’s awesome-neovim list, Tim Pope (tpope), and /r/neovim. So far I’ve not run into issues with plugins fighting each other or being incompatible.
In addition to kickstart’s configuration, I installed:
- buffer manager
- using barbar.nvim
- directory manager
- using the wonderful oil.nvim
- and neo-tree.nvim for my sidebar
- colorizer
- session manager
- using vim-obsession to get a similar experience to VS Code workspaces
- (more below)
- rainbow parentheses
- using nvim-ts-rainbow forked by the wonderful lincheney
- indentation guides
- fzf.vim instead of telescope
- (more below)
- movement plugins
- leap.nvim crazy plugin to navigate to the exact word you want
- quick-scope enhances the
fmode to highlight the first character of each word mini.moveto quickly move things around instead of usingd&p(highly recommend this)
- more git plugins
- vim-fugitive for some extra Git bits
- vim-flog for browsing Git logs
- vim-gh-line for opening stuff in the browser
- kickstart has gitsigns.nvim out of the box which is a great plugin for seeing changed lines/hunks
- a bunch of small quality of life plugins
- bullets.vim for editing markdown lists
mini.cursorwordto show other matches on highlighted words- committia.vim nicer git commit editor
- vim-easy-align for aligning things, e.g. by whitespace or colon
- nvim-treesitter-context for getting function scoping when scrolling
- rainbow_csv for clarity when editing tsv-like files
- vim-repeat
I’m not likely to keep this post updated. Source of truth is available in my dotfiles, but I hope the above list and three links (especially awesome-neovim) will help people get started.
I’ve got 52 plugins installed in total (including some not mentioned above), so I’ve doubled the amount from kickstart.
Kickstart comes out of the box with telescope.nvim which is a fuzzy finder for Neovim. I try use fzf (another fuzzy finder) everywhere I can, so while telescope was installed and working well I use fzf for Ripgrep and file finding. The telescope setup in kickstart works really well though so I suggest people to try it out first.
Screengrabs
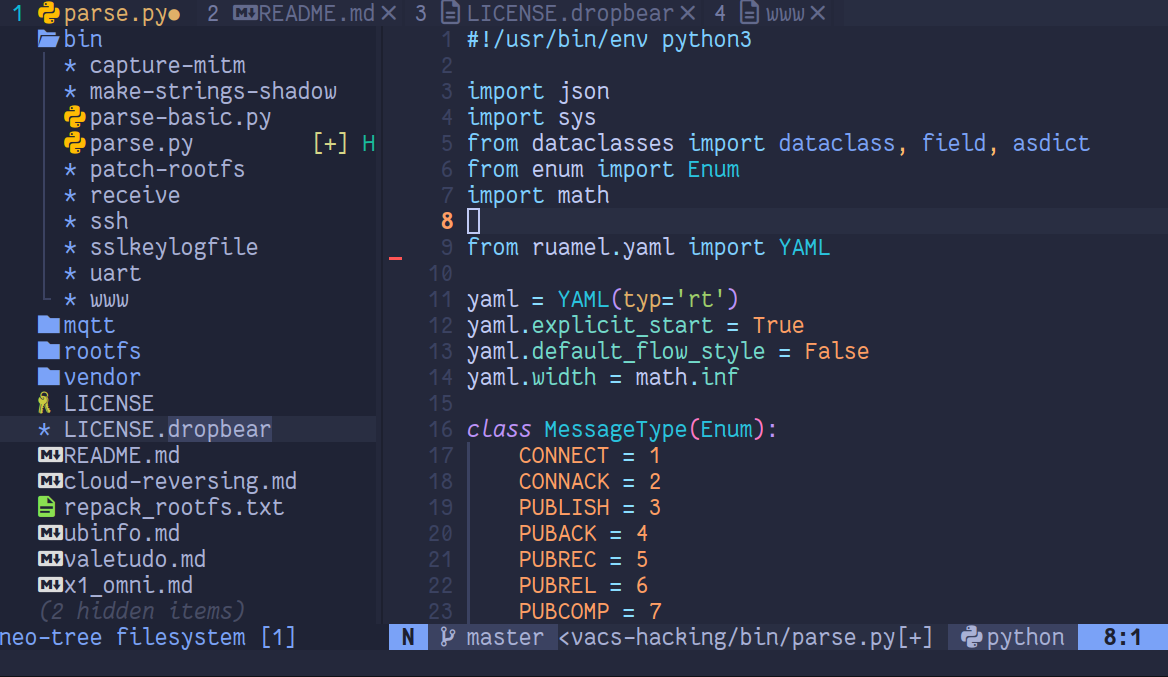
My Neovim with the file manager shown
A demo of me using Neovim. leap + fzf + LSP (recorded with asciinema, click to enlarge)

Working remotely
The nice thing about Neovim running in a terminal is I can resume my sessions remotely as all my shell sessions run within a tmux session. This is a reference to my-workflow-philosophy#resumable. Check out my other post if you have not :)
Sometimes I work on my desktop, and other times on my laptop on the couch. When I move to the couch I SSH to my desktop, press CTRL + b (my prefix key for tmux), then press s to interactively see my tmux sessions, select my Neovim session and continue working. When I go back to my desktop everything is the same as when I finished on my laptop. Super seamless.
To match the Remote SSH VS Code extension I either run Vim directly on a server, or mount the remote file system with SSHFS or SFTP over rclone and edit locally via Neovim.
VS Code key bindings
I was used to VS code’s keybindings for commenting (CTRL + /) and searching for files (CTRL + p), so I bound those in Neovim too. Eventually I want to remove these hot-keys and rely more on Vim modes instead, however keeping some bindings has greatly aided transitioning.
Session Management
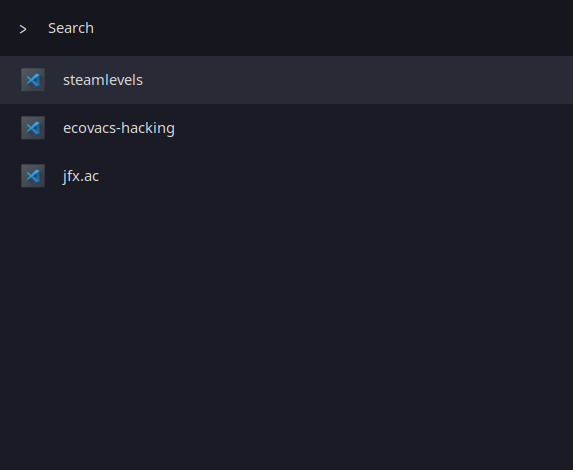
When using VS Code I create VS Code workspaces for each project and save them in ~/.code-workspaces/. I had a Rofi selector which let me select and open my workspaces. It looked like this:
For Neovim I use vim-obsession by Tim Pope which extends the in-built Vim mksession command to save and resume sessions more aggressively, effectively behaving like VS Code workspaces. Starting a session is done with :Obsession ~/.nvim-sessions/x and resuming sessions is by nvim -S ~/.nvim-sessions/x.
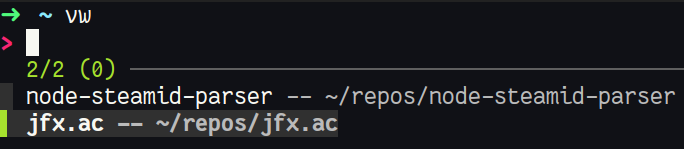
To make resuming sessions easier I use a shell command vw with custom tab completion. It looks like this:
The source code is located here:
- https://github.com/itsjfx/dotfiles/blob/master/bin/vw
- https://github.com/itsjfx/dotfiles/blob/master/.completions/_vw
Things to improve
Right now I’m very happy overall but there’s a few things I want to improve on.
I don’t have a debugger nor dev containers working in Neovim at the moment. A project I work on utilises these two things heavily so I may need to continue using VS Code until I figure out how to get it working nicely in Neovim.
There’s also a ton of plugins I’ve installed but have not understood much about. For example, Gitsigns, Fugitive, and oil have a bunch of powerful features and bindings I’m not utilising, so I hope I figure these out eventually.
I also miss having a multi line buffer manager in VS Code, and while barbar is nice it continues overflowing horizontally if I open too many buffers, so I hope to find a buffer manager that works like VS Code did.
There’s also a ton of Vim stuff I still need to learn :)
Conclusion
I hope this helps someone else switch to Neovim and gives some ideas on how to do the move. I highly recommend learning how to Vim in the shell, then trying out Vim bindings in your current editor (if possible), and then trying out Neovim as your main editor if you feel like moving.
Learning Vim in the shell as a minimum will be extremely fulfilling and help you doing basic operations in the terminal.
Remember nobody is forcing you to use Vim everyday and you can always go back to VS Code or your original editor :)
See also
:Tutor- https://github.com/ofirgall/learn-nvim/blob/master/media/EverythingEverywhereAllAtOnce.md
- this helped inspired my Neovim move
- https://ofirgall.github.io/learn-nvim
- helpful book
- https://github.com/nvim-lua/kickstart.nvim
- https://didoesdigital.com/blog/neovim-to-vs-code
- the opposite of what I did
- awesome-neovim
- the list of plugins from #configuration
Thank you for reading
Thank you so much for reading my post. If you have any feedback or queries, please reach out to me. My details are on the home page.